
iptables过滤
相信经常访问外网的人非常熟悉这个提示
可能是因为国家的访问限制,也可能是因为网站的服务器根本不想让我们访问
网络流量的路径
可以将服务器划分为硬件(网卡),内核空间,用户空间三部分
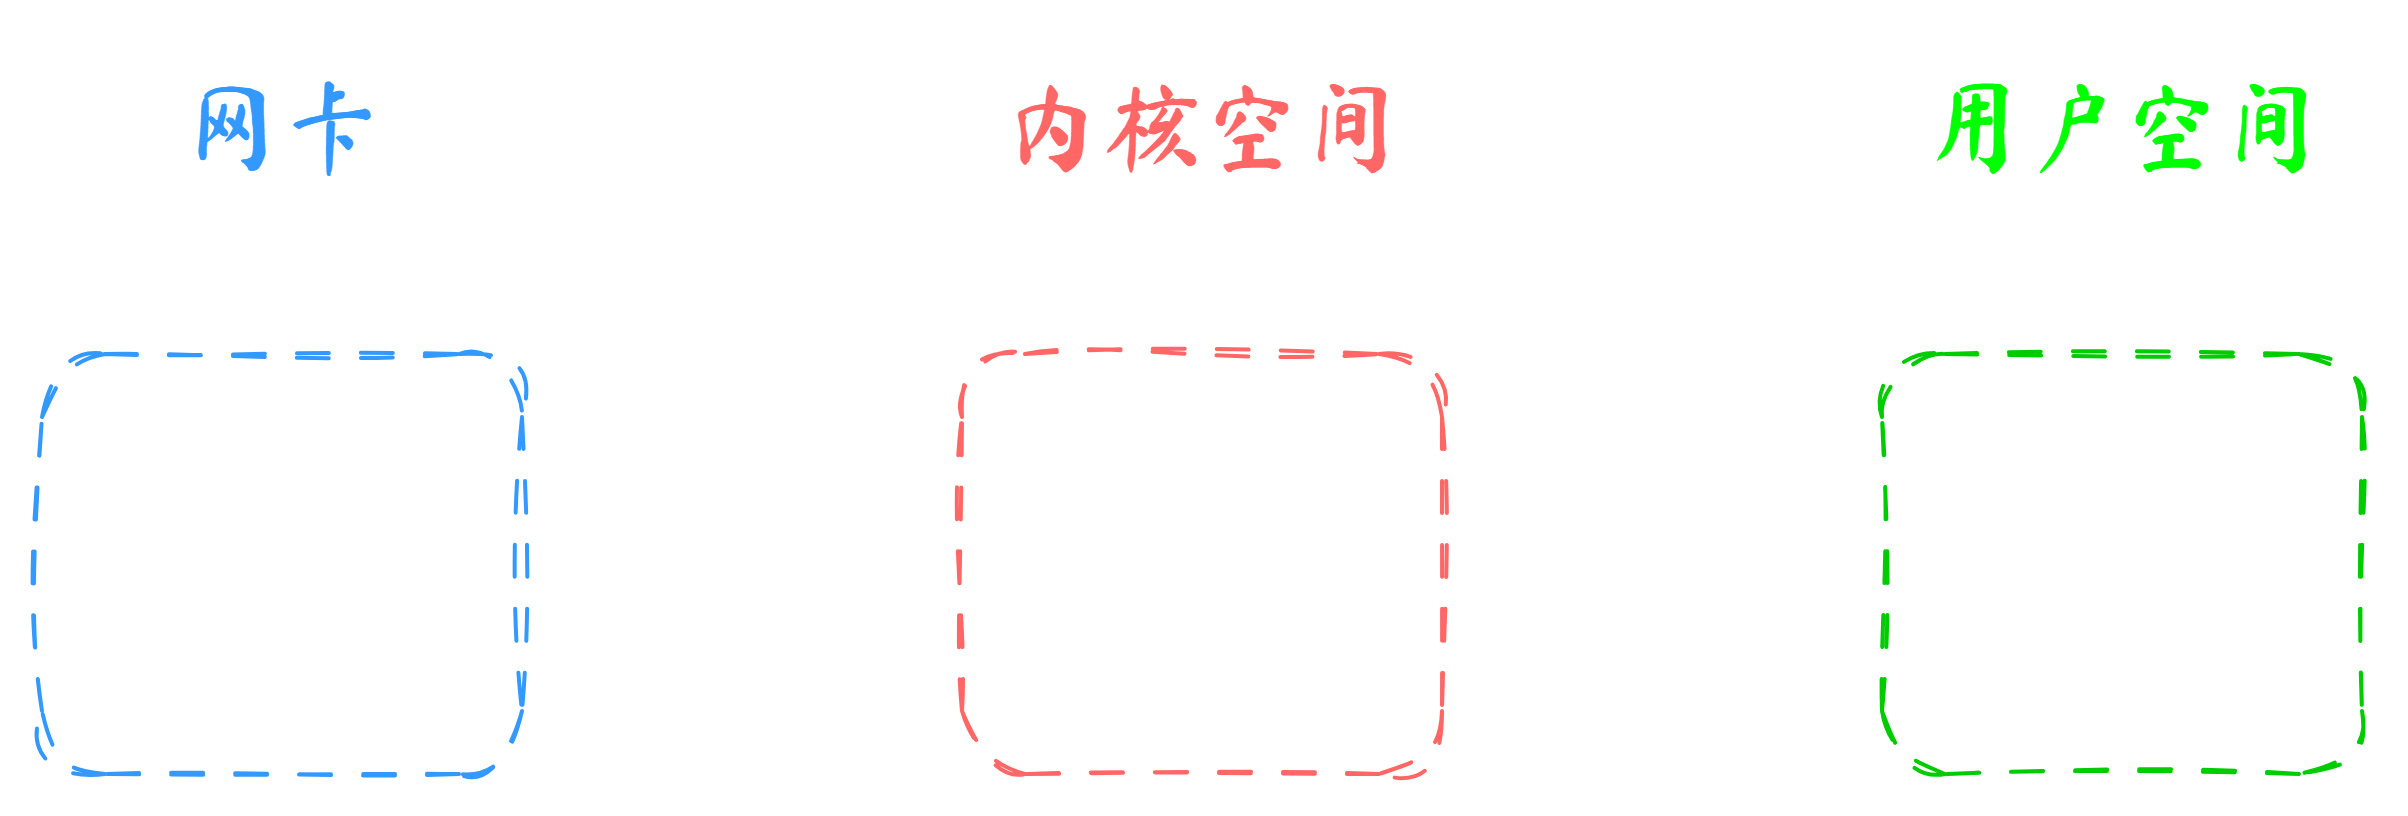
网络流量从网卡接收,经过Linux内核,然后到达用户空间的网络应用
要进行流量的控制,当然要在内核里进行处理,这样网络应用的前面就有了一道防火墙
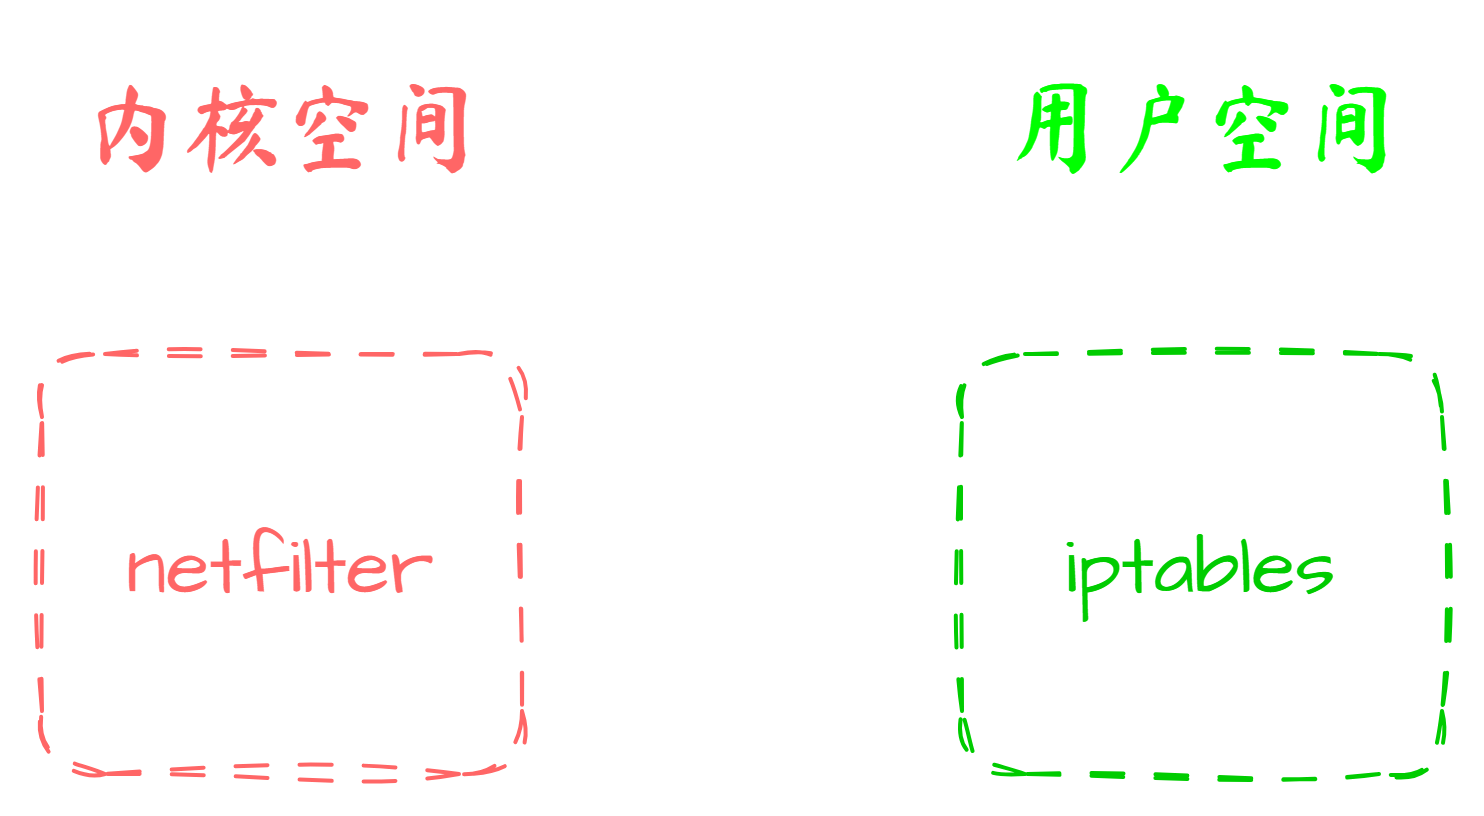
netfilter和iptables的关系
Linux内核中有一个 netfilter 框架,流量进来就会触发 netfilter 机制从而进行流量过滤
但是直接操作 netfilter 并不太方便,所以 iptables 提供了一套方便的命令行工具,可以用来管理 netfilter
可以理解为, iptables 在前端, netfilter 在后端,使用 iptables 命令可以执行复杂的流量过滤逻辑
iptables简介
iptables 是linux从2.4版本引入的防火墙解决方案,顾名思义它有多个表格,包括 filter 表、 nat 表、 mangle 表、 raw 表、~~ security 表~~
最常用的表就是 filter 表,用作流量过滤
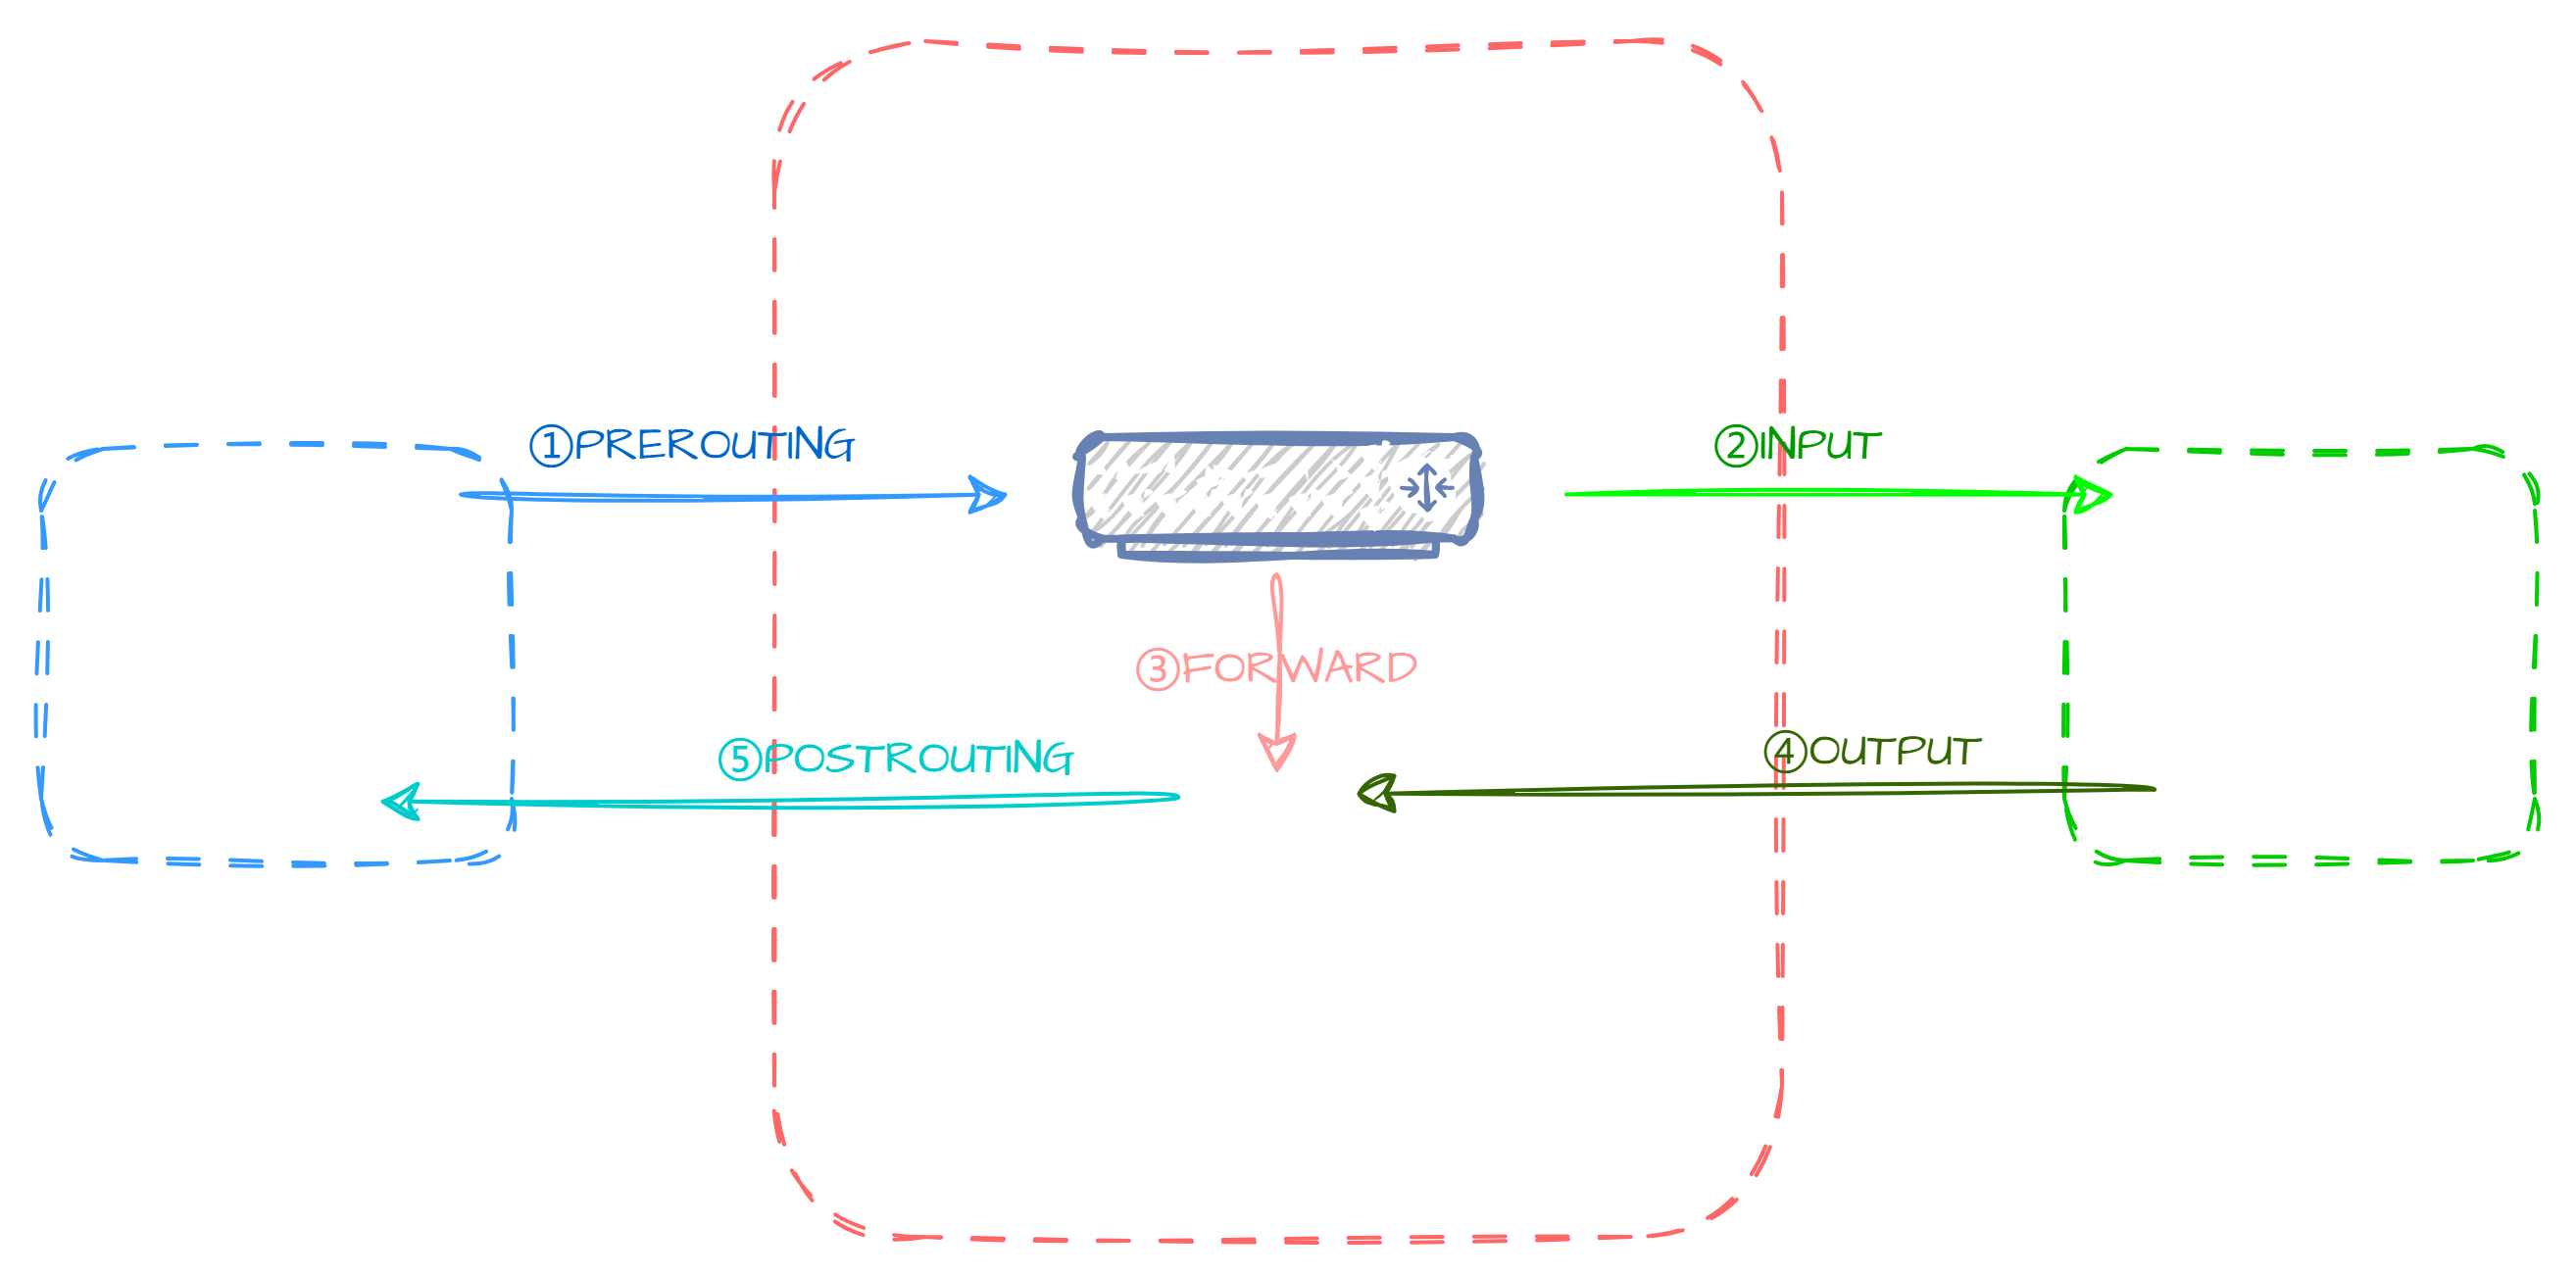
当我们的Linux系统在路由器上使用时,网络流量会分为五个链路:
INFO
- PREROUTING:当数据包到达一系统时就由此链路负责
- INPUT:当数据包目的地是本机时就由此链路负责
- FORWARD:当数据包只是经过本机路由要转发时就由此链路负责
- OUTPUT:当数据包从本机发出时就由此链路负责
- POSTROUTING:当数据包离开一系统时就由此链路负责
当我们使用 filter 表进行数据过滤时,只需要管理 INPUT 、 OUTPUT 和 FORWARD 这三个链路
即是对本机入站,出站以及转发的数据包进行过滤
当我们想要配置某项规则时,只需要在对应的链路中添加规则即可
iptables命令
根据上文的描述,我们可以知道, iptables 中有很多个表,每个表中有很多个链,每个链中又可以包含多条规则

这就是 iptables 命令的基本结构
查看表内容:
wangyining@xubuntu:~$ sudo iptables --table filter --list # 查看filter表Chain INPUT (policy ACCEPT)
target prot opt source destination
Chain FORWARD (policy ACCEPT)
target prot opt source destination
Chain OUTPUT (policy ACCEPT)
target prot opt source destinationTIP
如果没有指定表,则默认使用 filter 表
为表中指定的链添加规则:
wangyining@xubuntu:~$ sudo \
> iptables \
> -- table filter \ # 指定filter表
> --append INPUT \ # 指定INPUT链
> --source 192.168.100.1 \ # 指定源地址
> -- jump REJECT \ # 处理方式为拒绝
Chain INPUT (policy ACCEPT)
target prot opt source destination
REJECT all -- 192.168.100.1 anywhere reject-with icmp-port-unreachable
Chain FORWARD (policy ACCEPT)
target prot opt source destination
Chain OUTPUT (policy ACCEPT)
target prot opt source destination因为添加时没有指定某个协议,所以默认这个源地址的所有协议的数据包都会被拒绝
此时如果使用ICMP协议ping包则会显示不可达 unreachable 错误
同样可以使用 DROP 来对数据包进行丢弃处理
wangyining@xubuntu:~$ sudo iptables --list --line-numbers # 查看所有规则,并显示行号Chain INPUT (policy ACCEPT)
num target prot opt source destination
1 REJECT all -- 192.168.100.1 anywhere reject-with icmp-port-unreachable
2 DROP all -- 192.168.100.1 anywhere
Chain FORWARD (policy ACCEPT)
num target prot opt source destination
Chain OUTPUT (policy ACCEPT)
num target prot opt source destination注意
此时同一个源地址有两个规则,将会按序号顺序执行规则,所以数据包将会拒绝
删除规则:
wangyining@xubuntu:~$ sudo iptables --table filter --delete INPUT 1 # 删除INPUT链的第1条规则此时第二条规则就会自动顺延为第一条:
Chain INPUT (policy ACCEPT)
num  target     prot opt source               destination
1    DROP       all  --  192.168.100.1        anywhere

Chain FORWARD (policy ACCEPT)
num  target     prot opt source               destination

Chain OUTPUT (policy ACCEPT)
num  target     prot opt source               destination
ipset
简介
通过 iptables 规则添加的方式,如果要对大批量的IP进行过滤,则会消耗非常大的资源
ipset 是 iptables 的扩展, 它允许你创建匹配整个地址 sets (地址集合) 的规则。而不像普通的 iptables 链是线性的存储和过滤,ip集合存储在带索引的数据结构中,这种结构即使集合比较大也可以进行高效的查找
安装ipset扩展:
wangyining@xubuntu:~$ sudo apt-get install ipset创建集合:
wangyining@xubuntu:~$ sudo ipset create test hash:net # hash:net表示网络地址显示集合内容:
wangyining@xubuntu:~$ sudo ipset list testName: test
Type: hash:net
Revision: 7
Header: family inet hashsize 1024 maxelem 65536 bucketsize 12 initval 0x558d1271
Size in memory: 456
References: 0
Number of entries: 0
Members:向集合中添加IP地址:
wangyining@xubuntu:~$ sudo ipset add test 192.168.100.1/24Name: test
Type: hash:net
Revision: 7
Header: family inet hashsize 1024 maxelem 65536 bucketsize 12 initval 0x558d1271
Size in memory: 504
References: 0
Number of entries: 1
Members:
192.168.100.0/24 # 成功添加的网络地址TIP
可以编写脚本向集合中批量添加IP地址
写入iptables:
> iptables \
> --table filter \
> --append INPUT \
> --match set --match-set test src \
> --jump REJECT
注意
当我们重启系统后,ipset集合将会丢失,所以需要将集合写入配置文件中,并在启动时加载
# 保存配置
$ sudo ipset save test > /etc/test.ipset
$ sudo iptables-save > /etc/test.iptables# 加载配置
$ sudo ipset restore < /etc/test.ipset
$ sudo iptables-restore < /etc/test.iptables思考
如果想过滤下游服务器的访问,操作哪个链?
操作 FORWARD 链
为什么ipset比iptables更适合过滤大量IP?
因为ipset使用哈希表索引,而iptables是线性匹配,时间复杂度较大
不使用iptables工具,如何操作netfilter?
可以通过编程语言调用netfilter库,自己编写规则